Steamed chicken success

I grew up in Fremont, CA, where there were numerous Asian immigrant communities. Finding authentic food was easy, and there was a lot of deliciousness.  I particularly remember a low-key joint near my high school called “Uncle Chong.”  I think a friend recommended it (she’s Vietnamese-American but her very foodie family kept tabs on all the great eats).  And, she directed me to try the “steamed chicken.”  It sounded dull, but it was actually a gorgeous dish, perfect in its simplicity.  For some reason it has been on my mind, so I did a little research online and the technique sounded relatively simple.

So, a couple of days ago, I took 4 bone-in, skin-on chicken thighs and dropped them in a ziploc bag with a couple of splashes of light and dark soy, a bigger splash of rice wine vinegar, and chunks of galangal (I had bought a “Thai ingredients” raw pack which groceries here bundle to use the lemongrass and such for my soup the other day, so had it on hand).  The next day I added slivers of ginger as well (procured after a grocery stop– you’d be fine to use just ginger, I think).  I turned it a couple of times in the fridge to make sure it was well-coated.

Today I put an inch or so of water in the bottom of a metal pan, and added the steamer insert just above.  I let it come to a boil, added in the chicken pieces with the chunks of ginger and galangal on them, and covered with a close-fitting lid.  I turned the heat way down to let it simmer/steam, and set the timer for 40 minutes.

I used my handy Alaskan oulu to chop up about a 2 inch knob of ginger, 5 garlic cloves, and 6 stalks of green onion, and sliced in a couple of chilies.  I dumped that, with a couple of tablespoons of oil, in a saute pan on med-low heat.  I let it cook for about 15 minutes or so; you want to draw out the flavors of the aromatics but not brown them.  I added some light and dark soy, rice wine vinegar, fish sauce, sugar, and sesame oil to a bowl, and then dumped in the aromatics with all the oil they’d cooked in.

When the chicken was done, I let it cool.  I then removed the skin and bone, shredded, and poured a few spoons full of the sauce over it.  It was SUPERB.  It wasn’t the same texture that I remembered from Uncle Chong– not sure if the salt penetration from the soy perhaps changed it, but it was absolutely full of delicious flavor, and the sauce was divine.  I’ve got some left and might use it with super crispy oven-baked chicken wings later in the week.  Not to worry, we’ll talk about how the super crispiness happens when I make it.

We ended up having the chicken along with the leftover Thai soup with the rice, baby corn, and mushrooms in it, so it felt like a complete meal.  I’d thought to make bacon-garlic cauliflower “rice,” but just did not feel up to more time in the kitchen.

If you want a super yummy low-carb meal, you can do as follows for your side dish:  cook up lardons in a wok and set aside, and pour off the grease. Use a bit of grease to saute mushrooms, set aside. Two chopped small onions and a whole lot of garlic cloves, chopped, and cook it up in a bit of the grease. Then take a big cauliflower, break it into pieces, and run it through the shredder attachment of your food processor. Add the it to the onion/garlic in the wok, stir fry on medium-high for two minutes, turn down to medium, and cover and let cook for 5 minutes. Add back in the mushrooms and lardons. Add a little soy, vinegar, fish sauce, oyster sauce, and terriyaki sauce (or your preferred mix of stuff– if you’ve made enough of the dipping sauce for the chicken, feel free to use that!). Scramble some eggs and stir them in. Would be good to garnish with some green onions, too.

While I am still not feeling 100% and my ear stuffiness and nose runniness continue to bedevil me, I’m glad we got to enjoy some noms.  Apologies for the lack of photos in this post.  I’ll up my game when I feel more the thing.

Stock in trade

I have an ear infection.  For the past 6 days, I’ve had congestion and ear stuffiness, felt awful, and been taking a cocktail of medicines (with a doc’s consult).  It did not get better, and today I finally started antibiotics.  I hope to bounce back, but it has been a rough week.

Since I was under the weather, a couple of days ago I decided I needed to do an easy thing to make a strong base for healing foods:  crock pot stock.  I ferret away carcasses of roast chicken, wingtips, backbones from when I’ve spatchcocked, the offal bits like liver and gizzard, extra chicken pieces I’m not cooking– all go into one or a few ziploc bags which I add to over time.  On stock day, they all get dumped in the crockpot, frozen.  In go roughly chopped carrots, celery with some leaves on, onion (I had no fresh ones on hand so used a half jar of brown onion paste), a couple of bay leaves, and a little bunch of whole peppercorns.  Leave it on low for 8-12 hours (overnight is good).  Strain it and you get the most delicious, unctuous stock– it gets pretty gelatinous when chilled.  I think the hipsters call this “bone broth.”  It’s delicious in a mug with salt and pepper when you need a lot of liquids.  It’s also exceptional for any sort of soup you might want to make– a couple of options in a moment.

The other thing I do when I make this stock is meticulously pick all of the super soft meat from the bones for our puppy bear, Tiffin.  Yes, even my dog is named after a food/meal.  He loves boiled chicken beyond all reason, so it’s a great bonus that this awesome stock yields several meals for him.

Now, what kind of soup can you make from this stock?  Well you could, as I did tonight, riff on http://www.thekitchn.com/recipe-chicken-in-coconut-milk-with-lemongrass-recipes-from-the-kitchn-81026.  I took chicken thighs with skin and bone, and seared them off in a pan (no need to use quite so much butter/oil, though even with significantly less than in that recipe, I dumped some out.)  I had some leftover coconut cream (from the glaze for the mango rolls!) and put that in, and about an equal amount of the good stock.  The juice of 1 1/2 small local limes, a big handful of torn kaffir lime leaves, one long lemongrass stalk cut into chunks, a big handful of cilantro stems, a few chilies left whole (chop if you want more heat than just the flavor), and a bunch of peeled garlic cloves.  A couple of splashes of light and dark soy, and some fish sauce.  In the oven at 375F for 45 minutes, then added fresh baby corn and mushrooms and back in for another 30.  It’s a bit fussy to then strain the broth, take the skin off the meat and chop it up, and fish out only the baby corn and mushrooms rather than catching the aromatics, but it’s well worth it.  If you’re more organized in the kitchen than I am, feel free to put your aromatics in a little cheesecloth bundle and tie off, and leave it in as a sort of Asian bouquet garni.   I had enough liquid that it was more soup than stew, and added some rice to each of our bowls, as well as a hit of Sriracha.  No photo, because it was yum and got nommed up quickly.  I’ve done it before and added rice noodles, such as pad thai noodles, which also tastes great.  You get almost a tom kha flavor.  It might not be entirely authentic, but it is super, super delicious, and is fantastic when you’re sick and can’t get ahold of a big bowl of pho.

The stock is immensely flexible.  You could also go “Italian” with:  http://www.food.com/recipe/olive-garden-zuppa-toscana-9782 .  Last time I made it I think I skipped the bacon entirely and used homemade stock, and it. Was. Sublime.  The photo doesn’t even do it justice.

zuppa toscana 1

The kale gets tender, the sausage is juicy, the soup itself is liquid gold.  SO delicious!  A friend gave me a pro tip– if you plan to freeze some, leave out the cream and just add that when you defrost/reheat.  Worked a treat.

And one other soup recommendation, this one pulled from: http://www.slate.com/blogs/browbeat/2012/06/06/roasted_zucchini_soup_recipe_with_tons_of_garlic_and_boursin_cheese_the_best_thing_to_do_with_abundant_zucchini.html.  Basically roast off zucchini, onions, and garlic, add the stock, add some boursin cheese, and use a stick blender or food processor.  I like to add dried mint– it works wonderfully.

You could also, as I do, boil up frozen broccoli in the stock, dump in shredded cheddar (shred your own and toss through with a bit of cornstarch to draw out the moisture and keep your cheese from splitting into oily grossness in the hot liquid!  Also useful for when you make mac and cheese, btw), and puree with implement of choice for yummy broccoli cheese soup.

This stock will be your BFF for making gravy, for pan sauce for simple roast chicken dishes– the uses are many.   Are you absurdly parsimonious and don’t have a dog?  You can still shred all the super soft chicken, and add seasonings, egg, and breadcrumbs, and fry up some croquettes, which you can then munch as a side with your mug of stock.

Yes, I know the weather’s heating up and the time for soup is past.  But summertime colds and other such ailments strike.  Plus up your couscous salad game by cooking the grain in stock.  I’ve had to bookmark the site which gives me the right ration– 1 1/2 cups of couscous to 2 3/4 of stock.  I boil it first, turn off the heat, drop in the grain, quick stir, cover, and don’t touch.  Then I chop up feta, chunks of red bell pepper and cucumber, and fresh mint and parsley.  By that time the couscous is ready– fluff with a fork and add in your other stuff, plus lemon zest, lemon juice, and olive oi.  Great with kebabs or sausages.

Stock instead of water makes polenta better– stock plus a ton of shredded cheese, ideally gruyere.  I had an Italian tell me, “Normally I don’t like polenta because I find it bland, but yours is very good.”

So, next time you have leftover raw chicken bits, get a freezer bag going.  If you want to be fancy, the madman chef Heston Blumenthal suggests using chicken wings, tossing them in milk powder, and roasting off.  This increases the Maillard reaction and gives you a really brown chicken base, which makes your chicken stock extra “chicken-y.”  He also uses garlic in his stock.  I don’t mind this but my husband prefers it without, so you do you.  But do make stock in your slow cooker if you’ve got one, because it will be delicious and will make everything you cook with it taste much better.   Now, one note, this stock will be intensely flavorful, but it won’t reduce.  If you want to concentrate it further, feel free to put it on the stovetop and cook it down as much as you’d like.  However, I don’t really see the need for that, since, as I said, it’s already extremely flavorful as-is.

Freeze it in gallon ziploc bags, or, if you want to be measured, in ice cube trays for 1 oz portions you can measure out for sauces and such.  Also, if you need to produce consomme or super clear stock for some reason, freeze stock, and let thaw over a strainer lined with cheesecloth into a bowl.  You’ll wind up with the clear broth you need without having to jump through the hoops you otherwise might.

Just desserts of this series of posts: Hanuman Sunshine Rolls

Thanks for staying with me through this small series of posts.  As I mentioned, mangoes, and fusion food, had been on my mind, and I wanted to create something unique and delicious.  I read recipes for mango cakes, applesauce cakes, pumpkin-based breads and desserts…  Finally, I settled on an experimental ideas.  I’d aim for a yeast roll, similar to a cinnamon roll, but with mango puree in it.  Then I had to figure out the filling and glaze.

Based on my reading and a Smitten Kitchen pumpkin cinnamon roll recipe, I came up with the following for the dough:

Warm 1/2 cup of milk for 30-40 seconds in the microwave.  Add a big pinch of saffron and 1.5 packets of active dry yeast.  Leave this to foam.

In a stand mixer with a dough hook, add 3.5 cups of flour, 1 teaspoon of salt, 3/4 cup of mango puree, 6 tablespoons of sugar, and 4 tablespoons of ghee.  Pour in the milk/saffron/yeast, and mix on low/medium until the dough forms a ball.  Cover the mixing bowl with plastic wrap, and leave to rise for an hour.  Once that’s done, put some ghee in a big ziploc, place the ball of dough in, and refrigerate overnight.

The next morning, take the dough out and let come to room temperature.  With floured hands, take about half the dough, and roll out into a rectangle on a floured surface.  Drop a spoonful or 2 of ghee and spread it across the surface.  Sprinkle on a big pinch of sugar.  Scatter a handful of chopped pistachios, and a handful of diced dried mango chunks.  Roll it up, and slice into 8 pieces.  Do the same with the second half of the dough.  Place your spirals in a round baking dish.  Cover with plastic wrap, and place in a warm place for the proof for an hour.  I turned my oven to 170F, then turn it off, and put the rolls in there.  When the proofing is done, you’ve got:

hanuman sunshine rolls 1

Get your oven up to 350F, and cook for 22-25 minutes.  They’ll look like this:

hanuman sunshine rolls 2

For a delicious glaze, combine 1/4 cup coconut cream, 1/4 cup powdered sugar, 1/2 cup mango puree, and 1 teaspoon vanilla.  Add to your rolls:

hanuman sunshine rolls 3

This is a real cross-over dessert.  I call them Hanuman Sunshine rolls because the saffron and pistachios make this reminiscent of royal Indian foods, and Hanuman, the monkey god, mistook the sun for a mango and reached for it.  You might similarly try to grab a still-hot roll.  They are utterly beautiful with their lovely coloring, they smell amazing, and they taste really quite good.  I might fiddle-faddle with the recipe to make these a bit lighter/puffier.  Not sure if the fruit puree or the ghee were responsible for making these a touch bready.  My own monkey-husband enjoyed them very much, though, and this is probably bound to impress guests for a special brunch or as an unexpected dessert after an Indian meal.  Hope you try them out and enjoy them, and keep me posted of any particularly successful tweaks!

Entremet: Meeting an Inspirational Chef

So my work and extracurricular blogging worlds collided last week, when we had a chef in town to conduct some culinary diplomacy.  Chef Floyd Cardoz is kind of a big deal:  http://floydcardoz.com/about/.  He’s also the soul of graciousness, chatting food, diaspora, and other issues with me, and providing gentle, constructive mentoring to culinary students.  I got to participate with him in a tasting in which 11 pairs of students prepared mains and desserts using American ingredients, such as walnuts, blueberries, and maple syrup.  It’s always fascinating to me to taste what international cooks consider to be “American food.”  Apparently they think we like a lot of sugar and big portions, and they’re not exactly wrong, if our chain restaurants are anything to go by.  Some of the dishes were creative and delicious; others were less successful.  I can’t imagine being a first- or second-year culinary school student and having to cook for a master in the field, so a hearty congrats to the talented group for putting on a terrific showing.

Taking the tasting seriously, and I am totally food geeked out to participate in a tasting for a cooking contest!

Chef Cardoz talked about his dislike of molecular gastronomy and “getting cute” in the kitchen, but was strongly in favor of fusion when done well.  At one point he mentioned that for samosas at his restaurant, he uses pate a brise dough and a sheeter, and bakes instead of frying.  I might have actually been enough of a fangirl to respond, “Chef, you’re blowing my mind!”

Representative photo of my general "Your ideas intrigue me and I wish to subscribe to the newsletter!" attitude throughout  this engagement.
Representative photo of my general “Your ideas intrigue me and I wish to subscribe to the newsletter!” attitude throughout this engagement.

In addition to the cooking contest for the students, we got a tour of their college, and then I was briefly in conversation with Chef Cardoz on stage.  He underscored the importance of passion and commitment, noting that skills can be taught, but he looks for the light in someone’s eyes when recounting a favorite childhood dish.  His own last meal, he said, would be his mom’s Xacuti and prawn curry.  In our offline chat, I was thrilled to learn that he likes Bengali food.  We talked about how it’s one of few Indian food traditions with “courses” and how I need to “budget” rice with each item so as to try everything relatives cook with love.  We also shared a taste for “lau chhechki,” a dish made from the peels of lau/lauki (a local squash) and bits of pumpkin, me because my grandmother made it, and Chef because he loved the no-waste ethos.

chef 4

And since the event, every other sentence to my husband has been “Chef said…”  Honestly, it reminded me of my father’s everlasting shame from when Niels Bohr came to their campus in Kolkata.  One of the professors introduced himself to Dr. Bohr and said, “I’m fishizist too!” (He was trying to articulate, “I’m a physicist, too.”) .  I sincerely hope I didn’t come across as that inept and goofy.

Regardless, since Chef Cardoz’s visit, I’ve been thinking a lot about fusion cuisine, and feeling a bit inspired, and that is what leads us to… the last post in this series.  Come back for it!

Appetizer in a short series of posts: mango desserts

Mango season in India is the compensation for the hot months, the soggy inconveniences during the monsoon, and much else that might vex us.  The varieties are near endless, though one of the best-loved is the Alfonso.  Small, sweet, and plump, they smell divine and taste incredible.  Prior to coming here, my husband didn’t “get” the love of mangoes, but he has since come around.  They truly are one of the most perfect fruits.  And in season, they are abundant.  When I last asked our driver to buy us some if he saw them at a good price, we ended up with 2 dozen.  It just wasn’t possible to eat all the mangoes before they started to turn, so I just peeled and dropped into a big ziploc, mushed around from the outside, and picked out the pits, making up a big bag of mango puree which I froze.  My husband defrosted it to use some in a milkshake, and I knew I wanted to make some sort of dessert.  But we’ll get to that in the next post.  For right now, let me revisit some previous mango wins.

Now, I’d already had a couple of successful forays into mango desserts.  The easiest of these, of course, is mango mousse.  Basically the pureed mango, unflavored gelatin, fold in whipped cream.  Vanilla is optional, as is sugar depending on how sweet the puree was, and powdered ginger can be a nice addition, too.  I’ve made a ginger cookie pie crust, baked, added chocolate on top to melt it, and brushed it all over to make a chocolate coating.  Once it cooled, I filled it with the mousse and topped it with mango pieces.

mango mousse pie

My next success, upon having a big batch of mango puree on hand, was mango cream puffs.  I did a good amount of reading online, and I ended up relying primarily on this recipe:  http://www.bonappetit.com/recipe/chouquettes-chantilly-cream.  I kept to the 1:1:1:1 ratio, basically a cup of liquid (some mix of water and milk), a stick of butter, a cup of flour, and a cup of eggs (for me this is 4, but crack them into your cup as egg sizes vary wildly.  You put the butter and liquid over medium heat, add a pinch each of sugar and salt, and let all the butter melt and the liquid come to a gentle boil.  Dump in the cup of flour, and stir away for 3-5 minutes, forming a ball of dough which you slap against the side of the pan.  Once that’s done, let it cool for a decent amount of time before stirring in the eggs, one at a time.  If you’re not overly fancy, transfer to a ziploc baggie, snip the end, and pipe onto parchment.  Follow the rest of the baking instructions in the linked recipe for timing, how to poke a hole in the bottoms and let them dry out, etc.

cream puffs 1

I sliced them in half and spooned in some mango mousse.  For a glaze on top, I cooked down some of the mango puree with a squeeze of lemon, some vanilla, and a bit of sugar.

cream puffs 2

These forays into mango desserts only whet my appetite for more.  Stay tuned to read the denoument.

Not exactly al pastoral…

I have a ridiculously good relationship with my mom.  We’re besties, we crack each other up, and we bust each other’s chops.  Think Gilmore Girls, but, you know, Bengali.  So for I don’t know, maybe like the last 15-20 years, we’ve had a long-running mock war of attrition over a kitchen item.  I am powerless to resist watching infomercials.  I love them, cannot get enough of them.  Late at night, I’ve been fixated for a full half hour as women have pulled the unfortunately named Australian product “Nads” from their legs to wax at home.  You can probably see where this is going.  Ever since I’ve been aware of its existence, I have hungered for a Ronco rotisserie like the Christmas Story kid wanted his bb gun.  And my mother, not unreasonably, dug in and said no, I wouldn’t use it, it’s likely not as awesome as Ron Popeil makes it out to be, etc. etc.  Now, I have had a job since my college days, pay my own way, and could absolutely have purchased one for myself.  But it was my single-minded goal that my mother buy it for me, and her equally obstreperous position that she would never do so.  She has spent more than I care to admit on fabulous, thoughtful, frivolous gifts for me, including a massive Bliss Spa gift card, gorgeous cashmere goodies, and all manner of pricey luxuries.  Yet the $200 Showtime Rotisserie was somehow a bone of contention.

Fortunately I have married into an exceedingly tolerant family, who find such weirdnesses hilariously delightful.  Apparently my husband’s grandmother was also keen on infomercials, and in an ill-advised moment, purchased two rotisseries for a steal and gave one each to her son and daughter.  That’s how it came to be that one day I received in the mail a heavy-ish package from my husband’s awesome aunt.  It continued a used-only-once-and-dear-lord-it-filled-the-house-with-smoke-sorry-but-in-case-you-actually-want-it Showtime Compact Rotisserie.   My husband used it once for a roast chicken, but I only saw the end product (good!) but he grumbled about the rotisserie’s terribleness and so it had just been hanging out on our counter.

Regular readers of this blog (all 3 of you) might recall that I had made an al pastor marinade and used it on chicken recently.  Pineapple, fresh orange juice, garlic, onions, chipotles, chipotle sauce, guajillo peppers, and such, pureed in the food processor.  So yesterday I dumped a 1 kilo-ish pork shoulder into it.  The shoulder was sort of oddly spread open, like the butcher had taken the bone out but not fully butterflied it.

So, today, I placed plastic wrap on it, pounded it out a bit with a meat mallet, and then added a big handful of cilantro and parsley, along with some orange zest, into the middle.  I rolled it up and used four of the Ronco elastic ties to sort of truss the roll.  Then my husband I wrestled with getting the damn thing loaded onto the weird prongs of the rotisserie.  We wanted to be sure to spear the pork, and have the prongs show up on the other side of it so as to place on the closing mechanism.  It took a few minutes, but we, as they say here, “did the needful.”

Next came loading the actual rotisserie.  Turns out the prongs-spit thing is just a little too short for the machine, and so it keeps dropping out of its slotted space.  Every time we tried to turn on the rotisserie function, it displaced the prongs, so we had to turn it off and place it again.  I say we, but this task fell to my husband.  Also, the included protective gloves seem to have disappeared.  Apparently at some point the housekeeper wore them to clean the bathroom, so they had to be retired.  So, my husband, using cloth oven gloves, kept readjusting the prongs.  Finally, using 2 cutting boards under the back end of the rotisserie seemed to tip it such that the prongs were only minorly displaced, and could still turn the meat without smacking it around on the surfaces or the heating element.  So, we were finally close to being able to “set it and forget it!”  From my light Googling of Showtime Rotisserie cooking times, pork shoulder was due to take 30 minutes per pound, so we let it go for about an hour and ten minutes.  I must admit, it looked glorious turning away in the rotisserie, and came it out stunning:

al pastor

I let it rest for some time.  I quality assured a couple of bits which had dropped to the bottom, and they were sublimely delicious.  However, when I cut into the whole roast, it was still really pink inside.  SIGH.  I fired up the cast iron, and sliced it all up.  The meat got 3 minutes per side in the pan on medium-high, and that did the trick.

My husband is a big fan of cubanos, so for him, I sliced “panini bread”, as the package called it, loaded it up with ham, swiss cheese, mustard, pickles, and some of the pork, and put it into that same cast iron pan with a grill press:

al pastor cubano

For me, there was the tail end of a bag of tortilla chips, which I topped with shredded cheese, salsa, sour cream, and homemade guac for some al pastor nachos.

al pastor nachos

It was good.  I just don’t know if it was “wrangle this devilish machine for 30 minutes, fear piercing your fingers on the weird prongs-spit, watch your husband howl with frustration, find 2 odd-sized cutting boards to steady the machine, wind up with undercooked meat” worth it, if you see what I mean.  Will we use it again?  Maybe.  But Ron Popeil was not entirely honest with me about the ease of use of his gadget, and frankly, I am disappointed.  If you can’t trust a television huckster, what in this life is reliable?!  The absolute worst part of this?  How much I HATE having to admit that my mom was totally right.  As usual.

Later this evening I intend to drown my sorrows in some ice cream.   This city has really fantastic ice cream, and it always surprises me when people go for insanely expensive imports.  We love the local place Naturals.  Most of their flavors have 3 ingredients– fruit, milk, and sugar.  The tender coconut is delicious, the fig is spectacular, and the sitaphal (custard apple), which is only available in season, is utterly divine.  But tonight it will be another seasonal flavor, lychee, on one of their gorgeous waffle cones (several times when I’ve been to the shop, a dude is outside making cones using a little waffle maker, and they sell these delicious confections for a mere 10 rupees a pop! I get a package or two of ice cream and 6-10 cones when I go, which lasts a while.)

Tomorrow I plan to bring you a truly special, never-before-seen (as far as I know) recipe of my own invention, so stay tuned!

Gyroscopic Monkey

The title of this post will only be immediately comprehensible to my mother.  For anyone else reading, by way of background (though not an adequate explanation by any stretch), many, many years ago,  there was either a news article or perhaps a note adjacent to the related exhibit at the Exploratorium, that was about monkeys testing gyroscopes.  My dad decided this was a good nickname for me.  It wasn’t even the weirdest one he’d chosen (the Bengali for “drunken sea lion” probably wins that, though there were  innumerable contenders).  Cut to now, when the main pet name I call my husband is of the simian persuasion, and he particularly loved the gyros I made for dinner…. So, this title works on… well, two rather strange levels, but there you are.

Now, about those gyros.  I love mall gyros in the U.S.  The springy, crispity, salty, savory mystery meat filling; the creamy, garlicky sauce; the puffy pita enrobing them– it’s totally yummalicious to me.   And so when I accidentally came across this:  http://www.seriouseats.com/recipes/2010/06/greek-american-lamb-gyros-recipe.html, well, I knew it had to happen.

It happened.  Eventually.  In a sort of round-about way.  Round, like a rotation, like a gyr... I'll show myself out.
It happened. Eventually. In a sort of round-about way. Round, like a rotation, like a gyr… I’ll show myself out.

It seemed to start ok– lamb is tougher to find here, so I figured minced goat would be fine, and I got 500gms, which is about a pound.  Last night I decided to do the salt/pepper/oregano to let the meat hang out.  I read the recipe quickly, and somehow, 2 teaspoons of table salt in the written recipe appeared, to my eyes, as… 2 tablespoons of salt.  Which is SIX teaspoons.  Which would have been inedible in a pound of meat.

Grateful that a re-read of the recipe today let me catch the error, I figured the solution would be to add more ground meat.  There, I was in luck, as our commissary got in a shipment of frozens, and I was able to pick up a 1.2 pound package of redacted.  (If my tongue-in-cheek use of that confuses you, read up on the meat that the state in which I’m resident has banned.)  I let it partially defrost, and when I got home, I blitzed 2 onions, a few garlic cloves, more fresh oregano, ground black pepper, the overly salted ground goat, and this new semi-frozen mince all in the food processor.  I left out the bacon as I already had too much salt, and I used meat with a slightly higher fat content than the recipe, so I figured it would work.  From my reading, very cold is ideal for the mince blitz, so the partial defrost made sense.  I pureed it to a very gluey consistency, and let it sit for an hour for the salt to permeate, if not fully cure, the whole batch.  Then I kept an ice cube on standby to gently moisten my hands, and patted out a rectangular loaf as per the recipe.  I cooked it for 35 minutes at 300F.  Not much juice seemed to escape, and I let it rest.

I freelanced on the sauce– a small single-serve container of plain Greek yogurt, almost as much mayo, juice of a small local lemon, 2 1/2 cloves of garlic in the microplane, bit of salt, and dried parsley and mint.  Very, very, very good.  I peeled and cut a cucumber into lengths and then quarters, and also cut a roma tomato into longish chunks.

I sliced the (very springy) gyro loaf and then broiled for about 3 minutes per side (I was impatient and didn’t let the broiler get hot enough before popping it in– be mindful of how quickly stuff can burn, and keep a close watch if it’s actually up to broiler temp!).  I loaded up store-bought pita wrap with the fillings and added foil for ease of eating, photogenic-ness, and to re-create the mall feel:

gyro

I still have half the loaf in my freezer, so I can defrost, slice, broil, and have this meal again, which will, I think, suit my monkey mate.  He enjoyed the gyros even more than I did– I was irritated by the slight over-saltiness which I brought upon us through my silly misreading, and I tend to prefer less salt, in any case.  I compensated with extra sauce, so it all worked out.  Onward and upward.

You got a pizza my heart

I love pizza, but only the average amount.  Which is to say, a lot, but not, like a devotee with strong preferences for a regional style or anything like that.  I mentioned in my bio page how much I adore Round Table Pizza, and I don’t know if it’s “California” style in some way, or just the happy taste of my childhood.  Getting to have it still transports me to those days, whether in Seattle before kicking off an Alaska cruise for our honeymoon, or for Christmas dinner in Dubai with my husband, mom, and aunt.  It’s a chain with a very narrow footprint, but it remains my favorite and I try to have it whenever I’m in the vicinity of one.  This next sentence will seem like a non sequitur, but stay with me.  I’ve never been to Chicago, either, and my only real experience of deep dish pizza was, I’m a little ashamed to admit, at Pizzeria Uno.  I tell you this, because I managed to recreate at home, what tastes like a magical hybrid between Round Table and Pizzeria Uno.  It was indescribably yummy.  Just look:

deep dish 1

So let me direct you to the basics of how the magic happened.  The crust was basically this one:  http://allrecipes.com/recipe/223075/deep-dish-cast-iron-pizza/.  I had to mix garlic powder and salt (I think the ratio is 1:3) to make garlic salt, but otherwise generally followed the first part of the recipe.  After the first rise, I put the lightly oiled ball of dough in a big ziploc bag and let it hang out in the fridge overnight.  My trawling of online forums told me it’s good to give yeast doughs a night before using them, and it seems to me to be better than working with them right away.  I took it out of the fridge about half an hour before I wanted to use it, and patted it into a (very large diameter) greased cast iron pan.

For the sauce, I jumped off from http://allrecipes.com/recipe/17319/exquisite-pizza-sauce/.  Instead of paste/water, I just went with canned whole tomatoes.  I also hate honey (it’s a weird thing, I know), so I went with some brown sugar, and I eyeballed the rest of the stuff, tasted, and adjusted as needed.  It was really very, very good.

Toppings included two kinds of salami, pepperoni, sliced mushrooms, black olives, red onions, and cooked chunks of Italian sausage (I used Johnsonville’s sweet out of the casing because it’s really tough to find any other decent Italian sausage here, and I can source that at our commissary).  Cheese was a mix of shredded mozzarella and a bit of shredded cheddar.

deep dish 2

It was incredibly tasty, but also, expectedly, heavy, enough that we maxed out on a slice each.  Leftovers didn’t last long, though, and it made me think about experimenting with slightly simpler doughs for cast iron pizza.

So, I read several recipes and settled on trying a different dough.  About a half small packet of the dried active yeast that comes in little envelopes in 3-packs, 3/4 cup of water, eyeballed 3/4 tsp of salt, eyeballed 3/4 tsp of sugar, 1 tsp of olive oil, and 1 1/2 cups of flour.  Stirred together in a big glass bowl with a wooden spoon, covered with plastic wrap, and left it out on the counter overnight and until I was ready to use.  Pulled off the plastic, sprinkled generously with flour and gently mixed dough with my hands (very sticky!) and mushed it into a greased big cast iron pan.  I patted it out as much as I could, then covered with foil and left to proof for one hour in an oven that had been brought to 170F and then turned off.

For the sauce, I tried a similar one from the recipe above, but decided on a cooked one.  I started with a little butter and olive oil and added in the spices.  I used a generous glug of worcestershire since we didn’t have anchovies, and some maple syrup in lieu of the honey.  I let it cook down for about 35 minutes so that it reduced and thickened,  It was good, but I think I’ll stick with the uncooked in future.  Cooking is an added step, and the results are not noticeably better enough to warrant it, in my view.

Toppings tonight were cooked lardons and banana peppers, and again a mix of mozz and cheddar.  I loaded up the pizza, let it cook on med-low on the stovetop for 3 minutes, and then put it into my oven at 550F for 12 minutes.  Took it out and shredded a little grana padano on top.

pan pizza 3

I should have peeked under it to check the bottom crust; it might have benefited from an extra couple of minutes on the stovetop.  Nevertheless, it was quite tasty.

pan pizza 2

The crust wasn’t quite Pizza Hut-esque, but had more of that vibe.  My husband preferred it to the deep dish.  Once commercial pizza that tastes like what we think of as pizza (ie, no tuna/”sweet corn”/grotesque imitation cream cheese product “injected” into the crust) is readily available, I don’t know that I’ll make pizza at home super regularly.  However, maybe if I perfect a crust recipe and combine it with my Round Table style sauce and toppings, I can still enjoy that west coast delight even in DC.


Meximelt someone’s heart

Ok, look, I’m from California.  I don’t feel like I can find a decent variety of delicious Mexican food even in most U.S. cities, let alone at overseas posts.  It is almost as challenging in cosmopolitan world cities as it is in developing world capitals with few international food options.  I’m lucky to find maybe one acceptably okay Mexican restaurant wherever I happen to be living at the time.  So, I’ve been experimenting with Mexican-ish cooking.

Now, I’ve got like 10 readers max, so it’s not like people are lining up to give me endorsement deals.  So, believe me when I tell you, you really need to get one of these:  http://www.amazon.com/Stovetop-Smoker-Original-Camerons-Stainless/dp/B00004SZ9D/ref=sr_1_1?ie=UTF8&qid=1463238125&sr=8-1&keywords=stovetop+smoker.  I should probably demand commissions from the company, because I recommend it to everyone who expresses even a remote interest in exchanging foodie thoughts.  It’s seriously excellent, and I’ll be talking about it periodically, for sure at Thanksgiving because we don’t expect to ever make turkeys without it again.

So Mexican food.  Or even a decent approximation.  Honestly, I’d happily settle for Chipotle if it were available, but it’s somehow not caught up to Starbucks in terms of global dominance, sadly.  So what’s a homesick foodie expat to do?  Copycat version at home!  Mind you, here, it requires trips to 2-3 grocery stores, and a single avocado costs almost as much as a burrito bowl there.  But it can be done, and sometimes it’s totally worth it.  I can vouch for this recipe:  http://www.culinaryhill.com/chipotle-chicken/ .  My preferred method is to use chicken thighs (though it’s also delicious with chicken breasts), smoke in the stovetop smoker for 30 minutes, then heat some oil on medium-high in the cast iron pan, and sear for 2-3 minutes per side with a grill press laid across the top.  Completely delicious.

chipotle chicken

For the rice, I melt a tbsp or so of butter, add a bay leaf or two, and saute a cup of Basmati rice until it’s translucent.  Then I add a little over 2 cups of stock (homemade is great, a good boxed one is fine), bring to a boil, and then turn down to low and cover.  I let it cook until all the liquid is absorbed and the rice is tender, adding a splash more stock of it seems to be drying out before the rice cooks.  Once done, I add the juice of a small lime, and a big handful of chopped cilantro, and cover it with the lid again.  I fluff it and stir through when ready to serve.

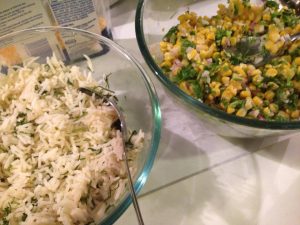
To make the corn salsa, defrost a bag of frozen corn.  If you’re as lazy as I am, take a large fresh jalapeno and quarter an onion and use a small food processor to chop.  Or do it by hand.  Add to the corn.  Add the juice of 1-2 small limes to taste, and a big handful of cilantro.  It gets better as it hangs out.

rice and corn

I am not a fan of beans, but my husband likes them, so, I’ve figured out how to do make decent black beans to add to your burrito/bowl.  Chop an onion and mince 2-3 garlic cloves with a garlic press or on a microplane.  Saute in a litle oil.  Add a bay leaf, a teaspoon or so each of cumin and oregano, and then add in  a can of black beans.  Let it hang out on low heat for a half hour or so.  Add the juice of half a small lime to finish it, if you’d like.

beans

I haven’ yet come to the most important item.  And that, of course, is guac.  I have been tempted to purchase this:  http://www.amazon.com/gp/product/B00KSJYSEM/ref=pd_lpo_sbs_dp_ss_2?pf_rd_p=1944687742&pf_rd_s=lpo-top-stripe-1&pf_rd_t=201&pf_rd_i=B014JWOXOI&pf_rd_m=ATVPDKIKX0DER&pf_rd_r=17EAPAKZ2TAD2ZF5D3GC.  If you’re at Chipotle, treat yo’self.  Get the guac.  They make a nice enough one.  However, I’ve never sought out the recipe.  Because I am SO HAPPY with my own guac recipe.  It might not be for everyone.  Some people like texture, like bits of onion or jalapeno.  Others want tomato in theirs.  Some add cilantro.  I won’t openly say how wrong I find those people.

Here’s what goes into my guac: one single perfectly ripe Haas avocado.  It should yield a little to very gentle pressing.  It should cut very easily, and you should be able to scoop out the inside with a spoon.  I use the spoon to shove the pit out/scoop around it, no fancy stab the pit with a knife trick needed.  Add 2-3 cloves of garlic grated through a garlic press or microplane.  Yes, I’m serious.  You won’t fully taste it, it adds a lovely background note and a bit of sharpness.  Add a good sprinkling of salt and the juice of a small lime.  Mash with a fork and stir up.  Taste for seasonings and adjust if needed.  That’s it.  I learned the garlic trick from one of the Food Network one-hit wonders, I think she won a season of Food Network Star and was from San Diego, perhaps?  In any case, I’ve been making my guac this way for quite some time, and I love it, cannot get enough of it.

guac

The finished Fauxpotle Bowl in all its glory.

So my beloved guac happened tonight, but not those other Chipotle items.  Tonight I made nachos.  Glorious, crunchy, salty, spicy, savory nachos.

nachos 2

For the chicken, I tried a different marinade.  More or less like an al pastor.  Into the small food processor, several chunks of pineapple, the juice of one orange, a small onion quartered, several cloves of garlic, about two chipotles in adobo from a can (I had been using just the liquid for the Chipotle knock-off chicken, and saved the actual peppers in a ziploc in the fridge.  I’m weirdly parsimonious about some things).   A few glugs of a chipotle adobo sauce purchased separately (if you’re opening a can, obvi just use liquid from that), some oregano, some cumin, and some salt.  Blitzed it up and put some of it on the chicken.  When I’d had a chance to buy guajillo chili powder the next day, I added some of that to the marinade, also.  Cooked in the smoker, finished on the cast iron pan, as mentioned above.

Chips on a plate, shredded cheddar, microwaved.  Chopped chicken, jarred jalapenos and olives, sour cream, jarred salsa, and some of that gorgeous guac I love to make (and even more, that I love to nom).  It. Was. SO. Satisfying!  Here, look again:

nachos 1

I have hung onto much of the marinade, and might attempt pork shoulder in our Ronco rotisserie.  If so, I’ll certainly report back.

I’ve also got some dough doing an overnight rise for cast iron pizza tomorrow, so I look forward to updating again soon.

“Begin at the Very Beginning” is the Advice I Will Now Ignore

It’s not yet 9pm, and I am now ready to kick off my first post following a super delicious dinner.  I actually thought for a while about what my inaugural recipe should be, but I decided to forego strategery and a calculated “voice” in favor of actually just telling you about tonight’s meal.

To do that, I’ll need to back up to Sunday, when we made one delicious stand-by and also one new (to my repertoire) thing.  The former was perfect roasted chicken, tender and flavorful, with crispy burnished skin.  There are some not-so secret tips to getting these results:

  1. Choose a decent chicken.  Here we tend to get “organic by neglect.”  Somewhat smaller chickens, not jacked up with stuff to make them “buxom.”  We have a butcher shop we like, and their chickens are always delicious when roasted.  Find a reliable source of chickens that still taste good when you don’t do a lot to them.
  2. Spatchcock, spatchcock, spatchcock.  Seriously.  If you’re not familiar with this term, it’s an extremely simple thing that is the work of 2-3 minutes with a good pair of kitchen shears. Take the chicken and place it on your cutting board with the breast down, ie, the legs touching the cutting board, and the open end (for stuffing) facing you.  You’ll see a round fatty bit jutting off the tailbone, sometimes called the “parson’s nose.”  Using sharp kitchen scissors, cut along the backbone, starting on one side of the parson’s nose and following the bone away from you, till you get to the end.  Do the same along the other side, and pull out the long backbone.  Set that aside (I like to cut into a couple of pieces with the shears and drop into a freezer bag for my stock collection.)  If you’d like, use the tip of the scissors to score the inside cartilage of the chicken such that you can easily spread it open like a book.
  3. Now decide on your herbs and fat to make a paste/rub.  For ours on Sunday, we used jarred truffle paste and unsalted butter, mixed together.  We’ve also done a mix of parsley, sage, rosemary, and thyme with olive oil, and other such combis.  Orange zest, dill, and chili flakes with oil would also be yummy.  Mix your rub items together.  Gently pull the skin up from the chicken and smear your mix onto the chicken flesh directly, as well as all over the skin.  Have time?  Marinate for a day or overnight, up to 2 days is probably fine.  Otherwise move to the next step straight away.
  4. Pre-heat your oven to 375F.
  5. Line a cookie sheet or baking tray with foil (only to avoid mess, not strictly necessary) and lay out your “open book” chicken with the cut side down on the foil.
  6. Pop the chicken into the hot oven, and leave it in for 45-50 minutes depending on the size of the chicken.
  7. When time is up, feel free to poke with a knife to check the juices are clear.  In our case, usually the leg/thigh is literally falling off the roast because it’s so juicy and tender at this point.
Not the specific one from Sunday, but a representational one so you... "get the picture." *dodges stuff thrown at me*
Not the specific one from Sunday, but a representational one so you… “get the picture.” *dodges stuff thrown at me*

That will be your platonic ideal of a perfect roast chicken, trust.  So, the other thing I made on Sunday was artichoke-spinach dip.  A little old school, sure, but I was in the mood for it.  I cruised online for recipes, and settled on the following:

  1. Take a can of drained artichokes and a package of frozen chopped spinach, thawed and drained (colander is fine, no need to wring it out!) and put them in an oven-safe dish.
  2. Add 8-10oz of cream cheese, eyeball a quarter cup-ish each of Greek yogurt and mayonnaise, and a tablespoon or so of Dijon mustard.  Add 3 or so minced garlic cloves (I used the garlic press to put these directly in), a couple of generous splashes of Worcestershire sauce, and several grinds of crushed red pepper flakes from one of those pre-fab mill things.  Add a big handful each of a couple of kinds of shredded hard cheese– I went with cheddar and grana padano.  Mix it all together.  Then add shredded cheese to the top– I used gruyere.  What can I say, we tend to have cheese around that needs using up!
  3. When you’r chicken’s been going about 30 minutes or so, tuck the dip pan into the oven with it, and let it finish out its time.  When you take out the chicken, turn off the oven, but leave the dip in the hot oven while you let the chicken rest briefly and then carve it.

So, on Sunday night we ate half the chicken and about half the dip, scooping it up with paos, local fresh yeasty white flour rolls that are yumtastic.

What, you might rightly ask, does that have to do with tonight?  Let me reward your patience.  Tonight, water went on to boil.  Buccatini broken in half went in for 11 minutes, and then I grabbed a few ladles full of the starchy water into a mug before draining.  The chicken, which I’d pulled before putting in the fridge, got briefly warmed in the microwave, as did the dip.  These got placed on the hot pasta, along with some of the pasta water to loosen it.  Stirred through and heaped into bowls, it was absolutely splendid, and super minimal work for a weeknight dinner.

I had good intentions of working further ahead to get some boneless, skinless chicken thighs into an al pastor marinade, but alas, I have not managed that as yet.  No doubt I will report when I do.